Your WooCommerce store generates an enormous amount of data. Every page view, every product click, every cart addition, every checkout step — it's all tracked somewhere. The problem is that most store owners are drowning in data while starving for insight.
The default WooCommerce analytics dashboard shows you revenue and order count. Google Analytics shows you traffic and bounce rate. But neither tells you why customers are abandoning at checkout, which products are cannibalizing each other, or where your marketing dollars are actually generating returns.
This guide is about setting up analytics that answer real business questions — not just tracking numbers for the sake of tracking numbers.
The Difference Between Vanity and Actionable Metrics
Before setting anything up, let's draw a clear line.
Vanity metrics look good in reports but don't drive decisions:
- Total pageviews
- Social media followers
- Time on site (average)
- Total registered users
Actionable metrics directly connect to revenue and growth:
- Revenue per visitor (RPV)
- Add-to-cart rate by traffic source
- Cart-to-checkout conversion by device
- Customer acquisition cost by channel
- Customer lifetime value by cohort
- Product-level conversion rate
The goal of your analytics setup is to make actionable metrics easy to find and vanity metrics hard to be distracted by.
GA4 + Enhanced E-Commerce: The Core Setup
Google Analytics 4 with enhanced e-commerce events is the foundation. Here's how to set it up properly for WooCommerce.
Step 1: GA4 Property and Data Stream
If you haven't already:
- Create a GA4 property in Google Analytics
- Create a web data stream with your store URL
- Copy the Measurement ID (G-XXXXXXXXXX)
Step 2: Install GA4 on WooCommerce
You have three options:
Option A: Google Site Kit plugin (simplest) Install the official Google Site Kit plugin, connect your Google account, and link your GA4 property. It handles the basic GA4 script injection.
Limitation: Site Kit alone doesn't send enhanced e-commerce events.
Option B: GTM + custom dataLayer (most flexible) Install Google Tag Manager, then push WooCommerce events to the dataLayer. This gives you full control over what data is sent and when.
Option C: Dedicated plugin (best balance) Plugins like "WooCommerce Google Analytics Integration" (by WooCommerce) or "GA4 for WooCommerce" handle both the base GA4 script and all enhanced e-commerce events. This is the recommended approach for most stores.
Step 3: Enhanced E-Commerce Events
GA4's enhanced e-commerce tracks the full shopping funnel through these events:
| Event | Trigger | Key Parameters |
|---|---|---|
view_item_list |
Product listing viewed | item_list_name, items[] |
select_item |
Product clicked from listing | items[] |
view_item |
Product page viewed | items[], value, currency |
add_to_cart |
Product added to cart | items[], value, currency |
remove_from_cart |
Product removed from cart | items[], value, currency |
view_cart |
Cart page viewed | items[], value, currency |
begin_checkout |
Checkout initiated | items[], value, currency |
add_shipping_info |
Shipping step completed | shipping_tier, items[] |
add_payment_info |
Payment step completed | payment_type, items[] |
purchase |
Order completed | transaction_id, value, items[] |
Each items[] array should include: item_id, item_name, item_category, price, quantity, and item_variant.
Verification: After setup, use GA4's DebugView (Admin > DebugView) to watch events fire in real-time as you walk through a test purchase. Every event in the table above should appear with correct parameters.
Step 4: Custom Dimensions
GA4's default dimensions don't capture WooCommerce-specific data. Add these custom dimensions:
- Customer type: New vs. returning customer (based on WooCommerce order history, not GA4 cookies)
- Payment method: Useful for correlating payment options with conversion rate
- Coupon used: Yes/no and coupon code, for measuring promotion effectiveness
- Shipping method: Correlate shipping choices with conversion rate
- Cart size bucket: Small (1-2 items), Medium (3-5), Large (6+) — for segmentation
Send these as event parameters with the purchase event, then register them as custom dimensions in GA4 (Admin > Custom definitions).
WooCommerce Built-In Analytics
WooCommerce's native analytics (Analytics tab in WP Admin) improved significantly in recent versions. Don't overlook them.
Revenue Report
The revenue report shows gross sales, refunds, coupons, taxes, shipping, and net sales over time. The most actionable view is comparing periods — this week vs. last week, this month vs. same month last year.
Set up a weekly habit: every Monday, check WooCommerce Analytics > Revenue, compare to last week. Look for anomalies, not absolute numbers.
Products Report
The products report shows units sold, net revenue, and orders per product. Sort by different columns to answer different questions:
- Sort by items sold: What's popular?
- Sort by net revenue: What's profitable?
- Sort by orders: What drives the most transactions?
A product that's #1 in items sold but #15 in revenue might be cannibalizing sales of higher-value products. A product that's #1 in revenue but low in orders is a high-ticket item that deserves premium placement.
Categories Report
The categories report reveals which product categories drive your business. This data should inform:
- Navigation structure (top categories get primary nav spots)
- Filtering options (most-shopped categories need the best filters)
- Marketing allocation (spend more on categories with the highest margins)
Customers Report
WooCommerce tracks customer acquisition and lifetime value natively. Key data points:
- New vs. returning customer ratio: Healthy stores have 25-40% repeat customers
- Average orders per customer: Directly relates to your retention strategy effectiveness
- Average total spend per customer: Your customer lifetime value baseline

Building Custom Dashboards
Neither GA4 nor WooCommerce analytics alone gives you the complete picture. You need a combined dashboard.
Looker Studio (Free)
Google's Looker Studio (formerly Data Studio) connects directly to GA4 and can pull WooCommerce data via Google Sheets or BigQuery. Build a single dashboard with:
Page 1: Executive Summary
- Revenue (WooCommerce) vs target
- Orders and AOV trend
- Revenue by channel (GA4)
- Top 5 products by revenue this week
Page 2: Funnel Performance
- Sessions > Product Views > Add to Cart > Checkout > Purchase
- Conversion rate at each step
- Drop-off percentages
- Comparison to previous period
Page 3: Traffic & Acquisition
- Sessions by source/medium
- Revenue by source/medium (not just traffic — revenue)
- Customer acquisition cost by channel (if you're importing ad spend data)
- New vs. returning customer revenue split
Page 4: Product Performance
- Product-level conversion rate (views to purchases)
- Products with high views but low conversion (opportunity for improvement)
- Products with high conversion but low views (opportunity for promotion)
- Category performance trends
Automated Reports
Set up automated email reports for metrics you need to monitor but don't need to actively check:
Daily: Revenue, orders, and any significant anomalies (revenue drop >20% from previous day's average)
Weekly: Full funnel report, top/bottom products, traffic source changes
Monthly: Customer cohort analysis, CLV trends, category performance, marketing ROI by channel
Looker Studio can schedule email delivery of any report page. GA4 can send custom alerts when metrics cross thresholds.
The Metrics That Actually Drive Decisions
With the infrastructure in place, focus on these seven metrics:
1. Revenue Per Visitor (RPV)
Revenue / Sessions. This single number captures both traffic quality and conversion effectiveness. If RPV goes up, you're either attracting better traffic or converting more effectively (or both).
Track RPV by traffic source to see which channels bring the most valuable visitors, not just the most visitors.
2. Add-to-Cart Rate
Add-to-cart events / Product page views. This tells you how compelling your product pages are. Industry average is 7-10%. Below 5% suggests a product page problem. Above 12% suggests strong product-market fit.
3. Cart-to-Purchase Conversion Rate
Purchases / Add-to-cart events. This isolates your checkout funnel from product page performance. If your add-to-cart rate is healthy but cart-to-purchase is low, the problem is in checkout (shipping surprises, payment friction, etc.), not on product pages.
4. Average Order Value (AOV)
Revenue / Orders. Track this weekly and segment by traffic source. Organic search AOV vs. paid social AOV vs. email AOV reveals which channels attract high-value shoppers.
5. Customer Acquisition Cost (CAC)
Total marketing spend / New customers acquired. This requires importing ad spend data (from Google Ads, Meta Ads, etc.) into your analytics. If CAC > first order profit margin, you're losing money on acquisition and need either higher AOV, better conversion, or a strong retention strategy to make up the difference over the customer lifetime.
6. Customer Lifetime Value (CLV)
Average revenue per customer over their entire relationship with your store. WooCommerce tracks total customer spend natively. For a more sophisticated model, calculate CLV = (Average Order Value) x (Purchase Frequency) x (Customer Lifespan).
CLV:CAC ratio should be at least 3:1. Below that, acquisition costs are eating your profits.
7. Product-Level Conversion Rate
Purchases of product X / Views of product X. This reveals which products convert well and which don't. A product with 1,000 views and a 1% conversion rate needs better imagery, copy, or pricing. A product with 50 views and a 15% conversion rate needs more visibility.

Common Analytics Mistakes
Mistake 1: Tracking Everything, Analyzing Nothing
The default reaction to "we need better analytics" is to add more tracking. More events, more dimensions, more reports. But data without analysis is just noise.
Fix: Set a weekly 30-minute analytics review. Look at your 7 key metrics, compare to last week, identify one thing to investigate or change. That's it.
Mistake 2: Ignoring Mobile/Desktop Segmentation
Your overall conversion rate might be 3%, but if desktop is 5% and mobile is 1.5%, you don't have a conversion problem — you have a mobile problem. Always segment key metrics by device category.
Mistake 3: Attribution Tunnel Vision
Last-click attribution in GA4 undervalues channels that introduce customers but don't close the sale. A customer might discover you through Instagram, research on Google, and buy through a direct visit. Last-click gives all credit to direct.
Fix: Use GA4's data-driven attribution model and check the Model Comparison report to see how different channels contribute at different stages of the journey.
Mistake 4: Not Tracking Internal Promotions
When you run a banner on your homepage or a promotional section on your shop page, track it as a GA4 select_promotion event. This tells you which internal merchandising efforts drive revenue and which are wasted real estate.
Mistake 5: No Alerting
If your checkout breaks at 2 AM, you shouldn't find out from a customer email at 10 AM. Set up alerts in GA4 Custom Insights:
- Revenue drops more than 50% compared to same day last week
- Conversion rate drops below 1%
- No purchase events for 4+ hours during business hours
- Error page views spike above 2x normal
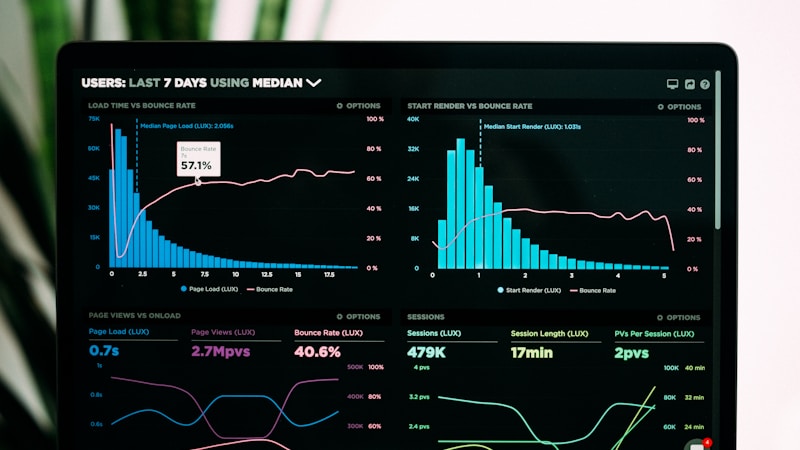
Also set up performance monitoring for technical metrics — analytics only catches the business impact after the technical problem has already hurt customers.
Privacy Compliance
Analytics setup must comply with privacy regulations (GDPR, CCPA).
Cookie consent: Use a consent management platform (CookieBot, Complianz) and only fire GA4 tracking after consent is given. GA4 supports consent mode, which adjusts behavior based on consent status.
IP anonymization: GA4 anonymizes IP addresses by default.
Data retention: Set GA4 data retention to the minimum needed for your analysis (2 or 14 months). Don't keep data you're not using.
Server-side tracking: For more privacy-friendly analytics, consider server-side GTM. This sends data through your server rather than the user's browser, reducing third-party cookie dependencies and improving data accuracy.
Quick-Start Checklist
- Install GA4 with enhanced e-commerce — use a dedicated WooCommerce GA4 plugin for simplest setup
- Verify all e-commerce events — walk through a test purchase with DebugView open
- Add custom dimensions — customer type, payment method, coupon usage
- Set up 3 GA4 custom alerts — revenue drop, conversion drop, checkout error spike
- Build a Looker Studio dashboard — 4 pages as described above
- Schedule weekly analytics review — 30 minutes every Monday, same time
- Configure automated daily/weekly reports — email delivery from Looker Studio
- Implement consent management — comply with GDPR/CCPA before launching tracking
Good analytics is about asking better questions, not collecting more data. Set up the infrastructure above, focus on the seven key metrics, and make one data-driven decision per week. That discipline compounds faster than any amount of raw data ever will.